I was pretty upset with what Wyrd did with Mei Feng (Foundry). Mei was a reliable leader with a lot of synergy and mobility with her scrap markers, and she was backed up by excellent Foundry models such as uber-buffer Sparks and robot-pig-with-an-attitude Mechanical Porkchop. All this was stripped away from her, leaving her team as one that handed out status conditions that punished enemy mobility.
Meh.
It was with some trepidation that I read the rules for my other keyword, Rasputina’s December.
The team did change somewhat. I lost ice alligator Bashe, my ice dancers, and my hoarcats. I gained an unreleased model, Mara, as the totem for Rasputina (Abominable) (AKA Raspy2). Totems are free models that come with the master.
This was my first time with Raspy2; previously, I’d played Raspy 1 because I loved the ice mirror ability. This ability lets those models with it cast spells through ice pillars to attack stuff from far away. In 4th edition, Raspy 2 is able to give this ability to everyone on the crew, and there are no distance or line-of-sight restrictions. Only magic can make it through, though; in third edition, Raspy 2 could do melee through pillars, but no longer.
Still pretty awesome, though.
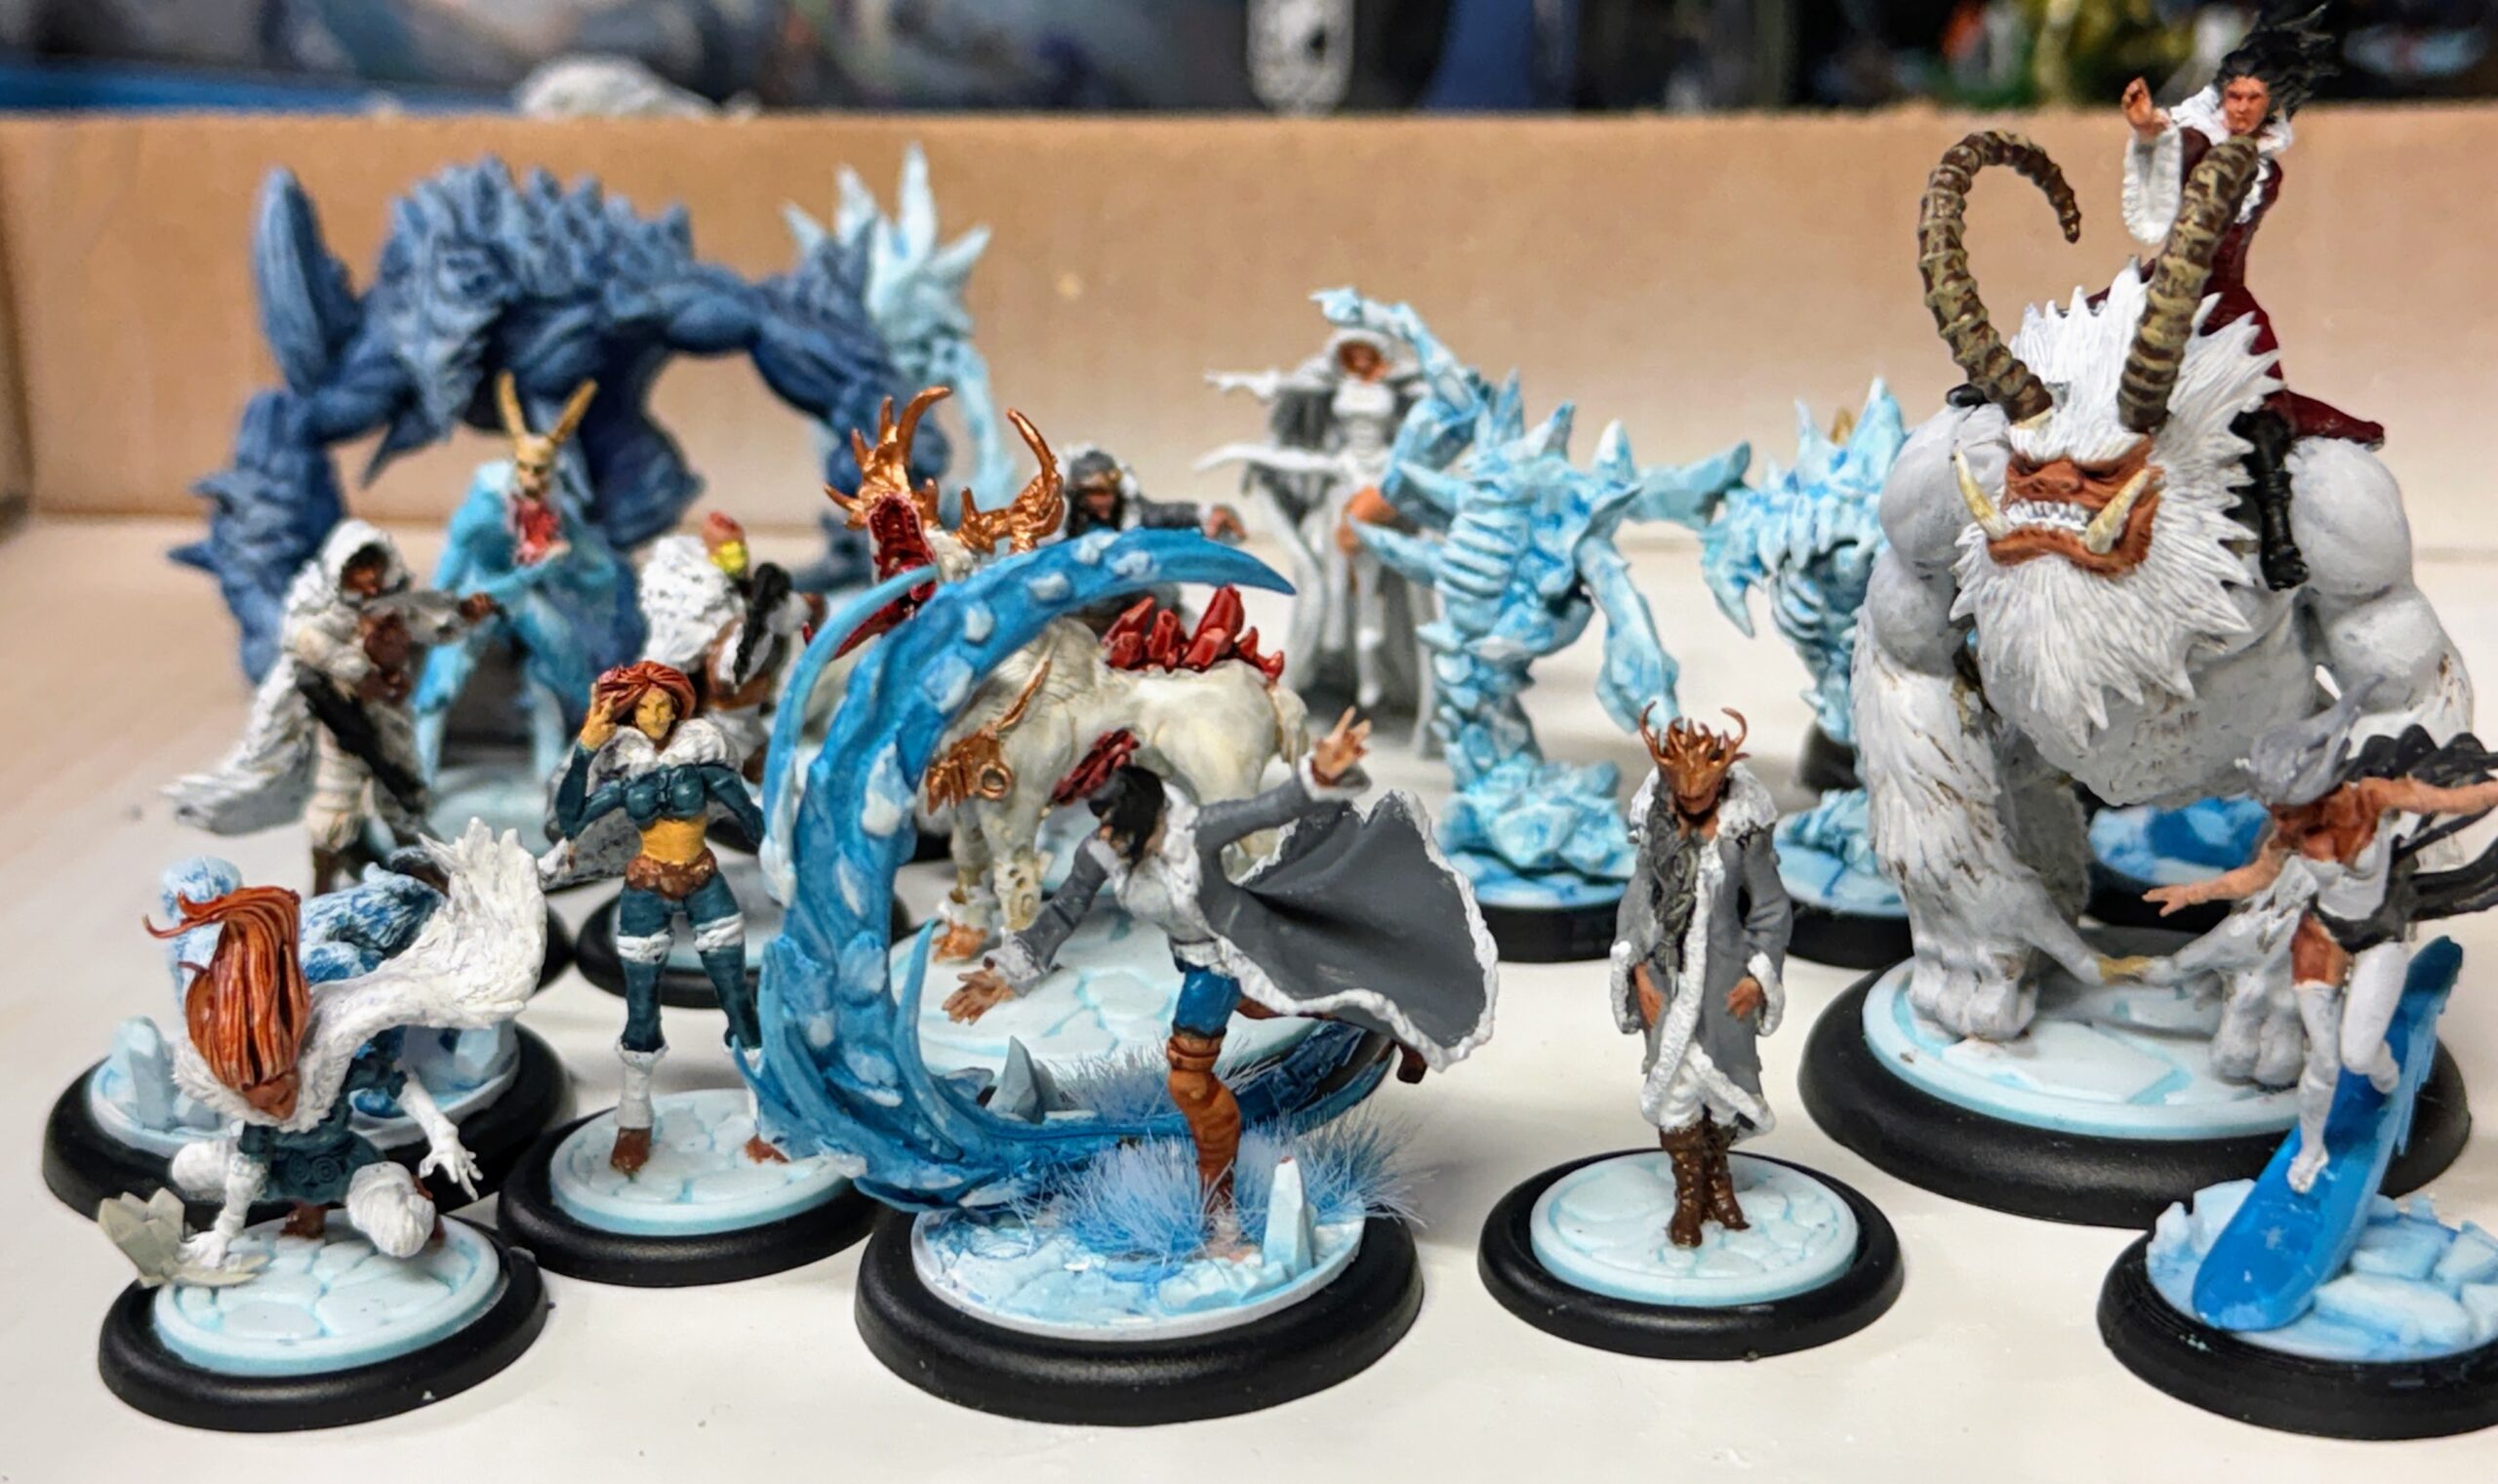
My crew:
Rasputina (Abominable) – Master, she makes ice pillars lock down enemies if she is within 6". This means she is more likely to be in the fight than previously.
Mara (Totem) – manipulates the deck, can take damage for other models. She’s meant to stand back and do her thing, but was more active in my game. I proxied her with an ice dancer.
Snow Storm (Henchman) – They (it’s a woman named Snow riding a beast named Storm) were sidelined in 3rd edition for Bashe, whom I can no longer use. They’re back on the roster. Decent hitter. Their Ice Blast ability has a trigger that lets it place a scheme marker between it and its target. With Ice Mirror, that could be a very long way away.
December Acolyte (Minion) – Cool thing about Raspy 2 is that she can summon allies during the game. The acolytes are a bit nerfed from 3rd edition, but I had a special job in mind for this one, and I summoned another one along the way. Their big thing is getting advantage in combat when they have height advantage over their target, and moving stuff out of the way when needed.
Blessed of December – Their role didn’t change much from 3rd edition. They still have a lot of movement, can hit hard, and in general, cause a lot of trouble. I proxied them with my old hoarcats because it was allowed.
Silent One – also summonable, although I didn’t. In 3rd edition, they were mini-Rasputinas. In this one, they do much the same, and they can use a trigger to drop scheme markers near ice pillars they make.
Kaltgeist – I didn’t hire one initially, but I did summon one later. The one I summoned just helped keep enemy models locked down. When it was finally about to die, I had it explode. It’s somewhat more powerful than in Third Edition.
Ice Golem – golems tend to be big tanks, and so is this one. It held down the center of the board. The opponent never even tried to hit it. It can buff friendly models near it.
Ceddra – previously, Ceddra was two models – Ceddra, a giant white stag, and Sightless Snow, an ex-Silent One who was merged with Ceddra by the December spirit. Now, they are named Ceddra (White Stag) and Ceddra (Sightless Snow). Swapping between them is now easier and comes with a heal. It can still take mutation upgrades, although it doesn’t get the free one at the start.
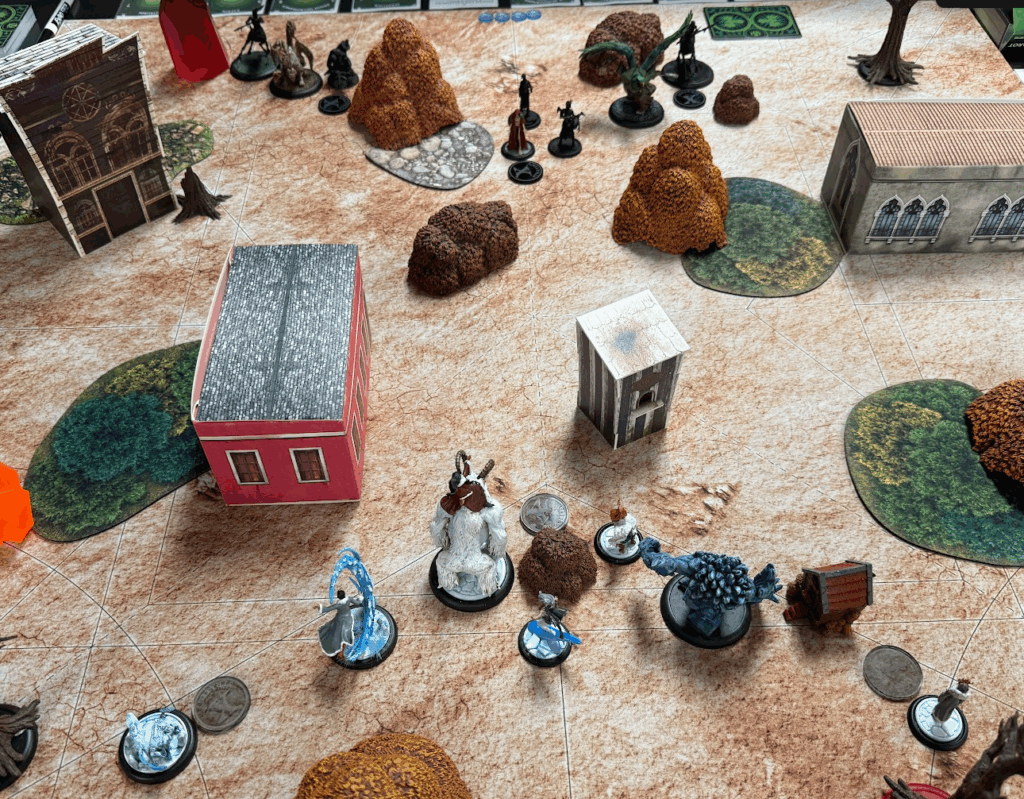
We rolled up a Wedge Deployment – deploying in a triangle. I was the attacker, so I set up along the edges of the triangle, as did my opponent.
Strategy was Boundary Dispute – each side has three strategy markers. They score when they have more friendly strategy markers on the enemy side of the board than the enemy has of theirs on our side. If those are equal, everyone gets a point! Prisoner’s Dilemma! Anyone can use an Interact action to knock a strategy marker 6" away – this includes the enemy’s.
That set the tone for the game. We were knocking our own strategy markers toward the enemy side, and knocking the ones they sent onto our side back to them. And of course they were doing the same.
I don’t remember the initial scheme pool; we both took Frame Job as our first. This scores when a friendly model at least partially on the enemy side of the map takes damage.
Turn 1: I placed my December Acolyte on a building near the enemy deployment zone, trying to trick them into hitting it. The enemy did try, once – and I flipped a Red Joker, winning the duel. Oh well. Silent Snow and Snow Storm kicked the center strategy marker up; Ceddra knocked hers up on the right, Blessed theirs up on the left. Silent One and Raspy made ice pillars; Raspy moved up to activate the center pillars; Silent One moved up to support the Acolyte. Mara helped Ceddra with the right marker.
We both got one marker each over the line, ending turn 1 at 1-1.
Turn 2: Both of us made the Frame Job scheme. I knocked an enemy strategy marker into the center, which tied up two enemy markers underneath Ice Golem’s feet. An enemy came up to deal with those, and Raspy surrounded him with ice pillars and summoned a Kaltgeist to keep it engaged. Ice Golem helped out by giving the Kaltgeist a damaging aura. The enemy Carrion Emissary came up to harry the Acolyte and summon zombies. I kept using the crew ability to push it away to keep it from doing anything interesting, but by the end of the turn, the Acolyte was poisoned and hurting.
I had two markers over the line to his one, so we ended turn 2 at 3-2.
Turn 3: I chose Scout the Rooftops as my new scheme; he chose Ley Lines. In mine, I have to choose two pieces of terrain height 2 or greater and leave scheme markers on them. Leaving three gets me an extra point. Enemy killed my Blessed on the left side of the map, giving it full control of its and mine strategy markers on that side of the board, while I controlled the center and the right. Acolyte jumped off the roof; poisoned with one health left, he used his last action to drop a scheme marker on the roof. Silent one dropped a second on the same roof. Snow Storm launched a third onto another building, but the enemy picked that one up. Raspy summoned another Acolyte to replace the dying one.
We both scored our schemes and I scored the strategy, so we ended turn 3 at 5-3.
Turn 4: We both chose Light the Beacons as our third and last scheme; this is just two scheme markers on the enemy half of the board, more than 10" apart, and no enemies in range. Since he had control of the left and I had control on the right, we could do this without being interfered with. I still had the strategy markers locked down. We did some fighting back and forth, but with the strategy and schemes in place, the fighting didn’t matter.
The winner of this strategy on turn 4 gets double points, we both made our schemes, and so we ended the fight 8-4 with me as the winner.
Epilogue: It was my opponent’s first time with his crew, first time playing 4e, and he hadn’t played Malifaux for months, so my win has an asterisk. We were paired as the most n00bish of those there, so…
I did go through his cards at home. There was a lot he missed that he’ll definitely get next time.
More Malifaux to come!